

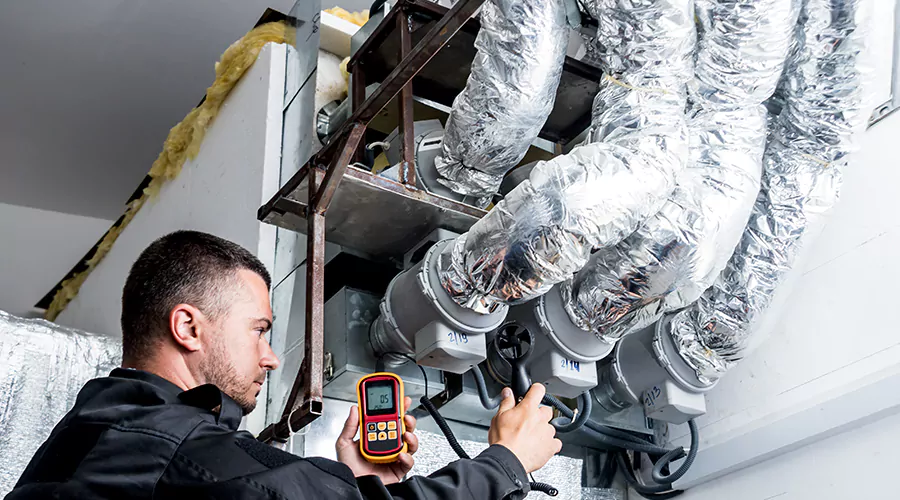
You can repair flexible ductwork by locating the damaged section and restoring its air-carrying liner, insulation, and outer protective jacket. Loose connections can often be reattached and sealed with approved HVAC materials, while severely torn or crushed ducts usually require replacement. In 2026, professional flexible duct repairs commonly cost $100 to $800, depending on the damage and accessibility.
Flexible ductwork carries heated or cooled air between HVAC equipment and individual rooms. Its lightweight construction makes it suitable for attics and other spaces where rigid metal ducts are difficult to install. However, the same flexibility makes these ducts vulnerable to punctures and damage when they are poorly supported or handled incorrectly.
A successful repair must restore both airtightness and the duct's original airflow passage. Covering a damaged outer jacket will not fix a torn inner liner, and sealing a connection will not correct a severely crushed duct. Identifying the affected layer is therefore the first step toward choosing an appropriate repair.
What Causes Flexible Ductwork to Become Damaged?
Flexible ductwork becomes damaged when its inner liner or protective covering is subjected to physical stress. Poor support and accidental contact are common causes, particularly in attics where ducts may be exposed during maintenance work. Connections can also separate when the duct is stretched or installed with excessive tension.
Poor Support and Excessive Sagging
Flexible ducts need suitable supports to maintain their intended shape. When hangers are too far apart, the material can sag and place stress on nearby connections. Excessive sagging may also create low points that increase airflow resistance and reduce the amount of conditioned air reaching a room.
Duct installation guidance generally calls for supports no more than four feet apart, with no more than one-half inch of sag per foot between supports. Support straps should normally be at least 1.5 inches wide to prevent the material from becoming compressed. Manufacturer instructions and local requirements should determine the final installation arrangement.
Torn Inner Duct Liners
The inner liner is the part of flexible ductwork that actually carries conditioned air. It is commonly supported by a spiral wire structure that maintains the duct's round shape. Sharp objects or excessive pulling can damage this liner and create openings through which air escapes. Our air duct leak repair team addresses these openings before they waste conditioned air.
A tear may be hidden beneath the exterior insulation and protective covering. Consequently, a duct can appear intact from the outside while still leaking conditioned air. Repairs must address the inner liner rather than only the visible outer jacket.
Loose Connections at Duct Collars
Flexible ducts connect to metal collars at supply trunks or register boots. If the inner liner is not properly secured, it can pull away from the fitting and create a substantial air leak. Poor installation or movement around the duct can cause an existing connection to separate.
A disconnected branch may release cooled air into an attic instead of delivering it to the intended room. The affected register can develop very weak airflow even when the HVAC blower operates normally. Reattaching the liner and restoring the seal are necessary before the connection can function properly again.
Crushed or Kinked Sections
Flexible ductwork can become compressed when heavy objects are placed on it or when the material is forced around a sharp bend. A severely kinked section restricts airflow because the available passage becomes narrower. This problem may occur without an actual hole or air leak.
Straightening a minor bend can sometimes restore the duct's shape when the material has not been permanently damaged. However, a crushed liner may not recover its original diameter. Replacement is often more appropriate when the passage remains deformed after the pressure is removed.
Moisture and Damaged Insulation
Flexible ducts usually contain insulation between the inner liner and outer jacket. This insulation helps reduce heat transfer as conditioned air travels through unconditioned spaces. When the protective jacket tears, humid air may reach colder materials and contribute to condensation.
Repeated moisture exposure can damage insulation and create conditions that support mold growth. Wet or contaminated insulation should not simply be wrapped with another layer of material. The moisture source must be corrected before deciding whether the affected duct can be repaired.
How Can You Tell if Flexible Ductwork Needs Repair?
Damaged flexible ducts often cause weak airflow or uneven temperatures between rooms. However, these symptoms can also result from dirty HVAC filters and closed dampers. A visual inspection of accessible ductwork provides better evidence of physical damage.
The most useful signs involve torn materials or separated connections. A flexible duct that has collapsed may also appear visibly narrower than nearby sections. Comparing the duct's condition with normal airflow patterns can help determine whether repair or replacement is necessary.
| Warning Sign | Possible Problem | Recommended Action |
|---|---|---|
| Weak airflow from one supply vent | Disconnected or restricted branch | Inspect the affected duct |
| Torn outer protective jacket | Exposed or damaged insulation | Examine the affected layers |
| Visible tear in inner liner | Air leakage | Repair using an approved method or replace |
| Duct separated from metal collar | Failed connection | Reattach and seal correctly |
| Severe sagging | Inadequate support | Restore suitable hangers |
| Sharp bend or flattened section | Airflow restriction | Correct routing or replace damaged section |
| Wet insulation | Condensation or water intrusion | Correct moisture and evaluate replacement |
| Whistling near a connection | Air escaping through an opening | Inspect collar and seal |
A damaged exterior jacket does not always indicate that the inner duct is leaking. The outer covering primarily protects the insulation, while the inner liner forms the air passage. Distinguishing these components prevents unnecessary replacement when only a protective layer has been affected.
What Materials Are Needed to Repair Flexible Ductwork?
Flexible duct repairs require materials compatible with the particular duct construction. Approved HVAC tape and mastic can seal suitable connections, while mechanical clamps or draw bands secure the inner liner to a collar. Replacement duct sections may be necessary when the existing liner is badly damaged.
The following materials may be needed depending on the repair:
- UL 181-approved duct sealing tape suitable for the application
- HVAC-rated mastic sealant
- Approved mechanical clamps or draw bands
- Properly sized rigid duct connector for a splice
- Replacement flexible duct material when necessary
- Compatible insulation and vapor-barrier covering
- Duct support straps or saddles
- Measuring tape and suitable hand tools
The materials should be selected after identifying which component has failed. Ordinary cloth-backed duct tape is not recommended for permanent HVAC sealing because its adhesive can deteriorate. A mechanically disconnected liner also cannot be reliably held together by tape alone.
Flexible duct manufacturers may specify particular fastening and sealing methods. Those instructions should be followed because different products use different liners and protective coverings.
How to Repair a Disconnected Flexible Air Duct?
A disconnected flexible duct can often be repaired when the inner liner and connecting collar remain in good condition. The repair involves reattaching the air-carrying liner and restoring the surrounding insulation. Simply pushing the outer covering back into place will not create an airtight connection.
Step 1. Turn Off the HVAC System
Switch off the heating or cooling system and wait until the blower stops. This prevents air from moving through the disconnected opening during inspection. It also makes it easier to examine the damaged materials without airflow disturbing loose particles.
Check whether the duct is located in a safely accessible space. Attics may have unfinished flooring and extreme temperatures. Avoid stepping between structural framing members or entering confined spaces that may contain standing water.
Step 2. Examine the Collar and Inner Liner
Identify where the flexible duct attaches to a metal collar or fitting. Determine whether the liner has simply slipped off or has torn near the connection. A loose but otherwise sound liner may be reusable, while a badly damaged end may require replacement.
Inspect the collar for sharp edges or deformation that could interfere with attachment. The connection should provide a stable surface for the liner and its mechanical fastener. A damaged collar should be corrected rather than covered with additional sealing tape.
Step 3. Restore the Inner Liner Connection
The inner liner should be positioned over the collar according to the manufacturer's instructions. A suitable draw band or other approved fastening method holds it in place. The connection must be secure enough to resist movement during HVAC operation.
Use the specified sealing method to close the joint between the liner and collar. Mastic or approved tape may be required depending on the duct product and installation instructions. Mechanical fastening and air sealing serve different purposes, and both must be addressed.
Step 4. Restore the Insulation
After securing the inner liner, return the insulation over the connection without leaving gaps. The insulation should cover the fitting as required by the duct assembly. Avoid compressing the material because compression reduces its effective thermal resistance.
If the insulation is wet or severely damaged, replacement may be necessary. Reusing saturated material can create recurring moisture problems around the connection. Any source of water intrusion should be corrected before the covering is closed.
Step 5. Seal the Outer Jacket
Pull the protective jacket into its proper position and seal it according to the manufacturer's requirements. The outer layer helps protect insulation from humid air and physical damage. A continuous vapor-retarding covering is particularly important in unconditioned spaces.
Use compatible sealing materials and avoid leaving openings near the collar. A properly attached inner liner can still experience condensation problems when the surrounding insulation or protective jacket remains damaged.
Step 6. Restore Duct Support
Check that the repaired duct has appropriate support near its connection. Excessive sagging can pull the liner away from the collar again and create another leak. Broad straps or properly designed saddles help distribute weight without crushing the duct.
After the repair materials are ready for normal use, restore HVAC operation and check for unusual airflow or movement. A repaired connection should remain secure while delivering air through the intended passage.
How Do You Repair a Torn Flexible Duct Liner?
Repairing a torn flexible duct liner depends on the size of the damage and the manufacturer's approved procedures. Small localized defects may sometimes be repairable with compatible materials. However, a badly torn liner or extensive damage to the surrounding insulation usually makes section replacement more reliable.
Begin by identifying the full damaged area without pulling additional material apart. A tear extending along the wire reinforcement may continue spreading when the duct moves. Covering only the visible portion with ordinary tape may leave the liner weak.
For a localized repair permitted by the manufacturer, the liner must be sealed with the approved method while preserving its original shape. The insulation and outer jacket must then be restored. If the product does not provide a reliable repair method for the damage, replacement is preferable to an improvised patch.
A flexible duct should maintain a smooth passage after repair. Any patch that significantly compresses the liner can create an airflow restriction even if the leak is closed.
How Do You Fix Sagging or Kinked Flexible Ductwork?
Sagging flexible ductwork can often be corrected by improving its support and routing when the liner remains undamaged. The duct should follow a relatively direct path with gentle curves. Sharp bends increase airflow resistance and can reduce heating or cooling performance.
Add or reposition suitable supports according to the manufacturer's installation requirements. General residential guidance recommends support intervals no greater than four feet and straps at least 1.5 inches wide. The duct should not sag more than one-half inch per foot between supports.
Avoid tightening narrow wire hangers directly around insulated flexible ducts. Concentrated pressure can compress the insulation and deform the air passage. Broad support straps distribute weight more evenly and help maintain the duct's round shape.
If a section has been crushed permanently, repositioning the hangers may not restore airflow. Replacement is generally more appropriate when the liner remains flattened or its wire reinforcement has become severely deformed.
When Should Flexible Ductwork Be Replaced Instead of Repaired?
Replacement is often the better choice when flexible ductwork has extensive physical damage or contaminated insulation. A sound disconnected connection may be repairable, but severely crushed or torn material can be difficult to restore reliably. The decision should focus on the condition of the inner liner and surrounding insulation.
| Duct Condition | Repair or Replace? | Reason |
|---|---|---|
| Loose connection with intact liner | Repair | Connection can be restored |
| Minor damaged outer jacket | Often repair | Inner air passage may remain sound |
| Small repairable liner defect | Depends on manufacturer | Approved method may be available |
| Severe liner tear | Replace | Air passage cannot be reliably restored |
| Permanently crushed section | Replace | Duct shape and airflow are compromised |
| Wet or moldy insulation | Replace affected material | Porous contamination may remain |
| Excessively sagging intact duct | Often repair | Support can be corrected |
Replacing one damaged branch does not automatically require replacing the entire duct system. A localized replacement may restore normal airflow when neighboring sections remain sound. However, the new duct must be correctly sized and supported to avoid creating additional restrictions.
How Much Does Flexible Ductwork Repair Cost in 2026?
Professional flexible duct repairs commonly cost $100 to $800 in the United States during 2026. Repairs involving insulated flexible ducts may range from $200 to $1,200 because insulation restoration adds work. Replacement of a damaged section commonly costs $400 to $1,500 depending on its size and accessibility.
| Repair Type | Estimated 2026 U.S. Cost |
|---|---|
| Flexible ductwork repair | $100 to $800 |
| Insulated flexible duct repair | $200 to $1,200 |
| Reconnecting disconnected ductwork | $250 to $700 |
| Repairing damaged insulation | $200 to $800 |
| Replacing a damaged duct section | $400 to $1,500 |
These figures describe different project scopes rather than charges that must be added together. A connection repair may already include sealing and restoring the outer jacket. The actual cost depends on accessibility and whether the affected material remains suitable for repair.
When Should You Call an HVAC Professional?
Professional repair is appropriate when flexible ductwork has substantial liner damage or a disconnected branch that cannot be safely reached. Wet insulation and repeated airflow problems also deserve further evaluation. These conditions may require replacement or testing that goes beyond ordinary household sealing.
A qualified HVAC technician can identify which layers are damaged and determine whether the existing duct can be restored. The technician can also check airflow and support spacing after repairs. For extensive duct modifications, evaluation of overall system balance may be necessary.
A repair should preserve both airtightness and the intended airflow capacity. Replacing damaged material with an incorrectly sized branch can create new comfort problems. Professional evaluation is particularly useful when several rooms are affected.
How Can You Prevent Flexible Ductwork Damage?
Preventing flexible duct damage requires suitable support and protection from physical contact. Proper routing helps maintain airflow while reducing stress on connections. Regular visual checks of accessible ducts can identify movement or insulation damage before a branch becomes completely disconnected.
Maintain Proper Duct Supports
Inspect exposed flexible ducts for sagging or compressed sections during seasonal HVAC maintenance. Support straps should hold the duct without pinching its insulation. Correcting displaced hangers early can reduce stress on connections and help prevent repeated tears.
Avoid Sharp Bends and Excessive Length
Flexible ductwork performs best when it is reasonably straight and properly extended. Unnecessary loops or tight bends increase resistance and reduce airflow. When rerouting is necessary, the duct should be arranged according to manufacturer requirements rather than forced around obstacles.
Protect Ducts During Attic Work
Avoid placing heavy objects on flexible ducts or using them for support while moving through an attic. Sharp tools and building materials can puncture the inner liner. After nearby renovation work, inspect safely accessible branches for obvious separation or damage.
Monitor Insulation and Moisture
Check exposed insulation for tears or recurring condensation. The outer protective jacket should remain intact to limit moisture reaching colder materials. Correcting water problems promptly can prevent further damage to the insulation and inner liner.
Conclusion
Repairing flexible ductwork requires identifying whether the damage affects the inner liner or its protective layers. Loose connections can often be restored, while severely torn or crushed ducts usually need replacement. Proper sealing and support help prevent recurring airflow problems. Significant damage may require professional repair. This week, inspect safely accessible flexible ducts for sagging, loose collars, and damaged coverings.